
Feldenkrais® Exercises
Lessons to improve your awareness and movement
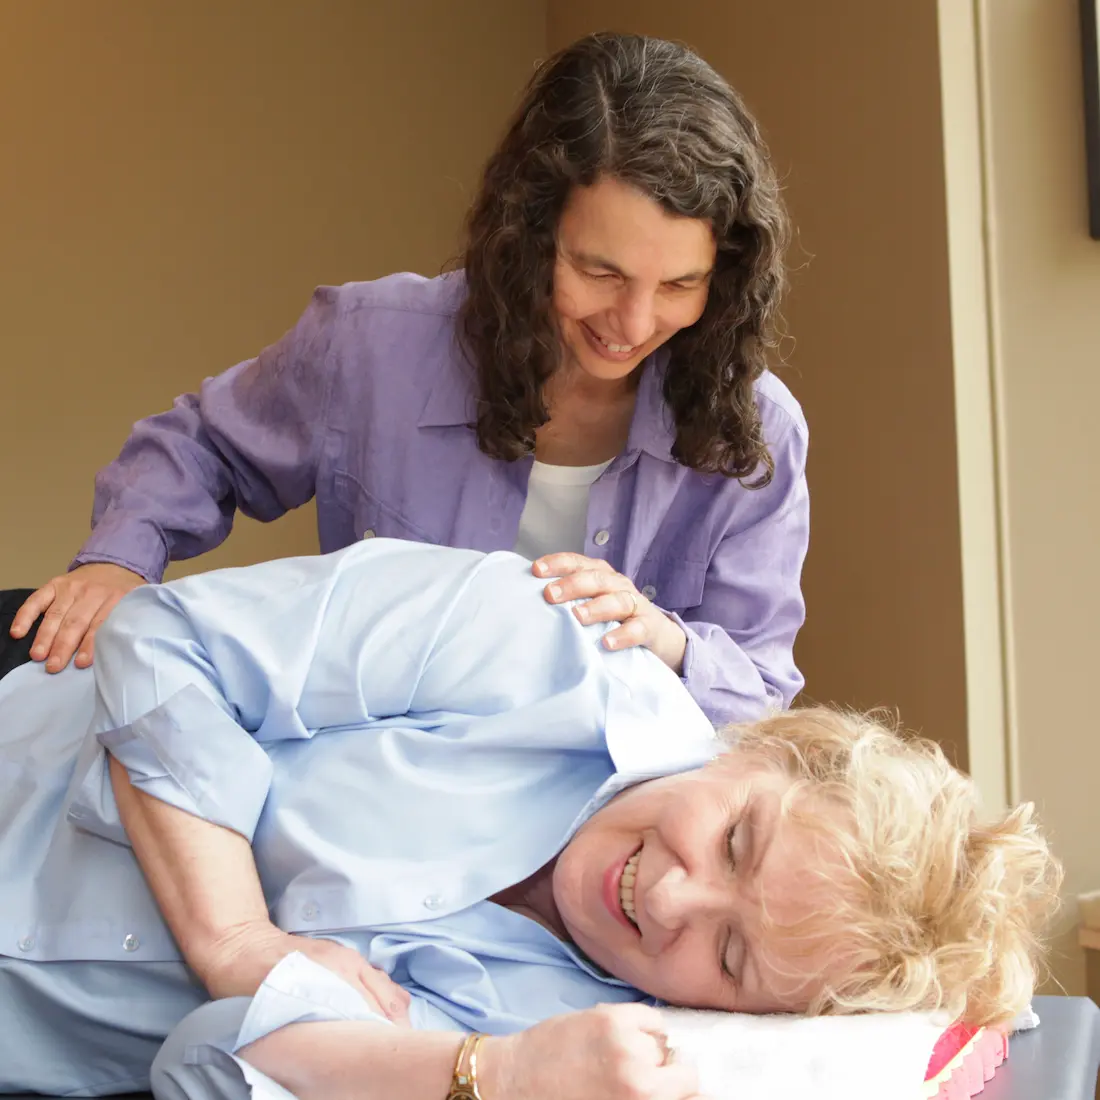
Feldenkrais exercises are learning experiments
Feldenkrais movement exercises are sequences of subtle, mindful movements. One client called them awareness builders. The movements are there to give you something to be curious about, and you learn by noticing what you do at a finer grain than you usually do.
They are not your typical fitness exercises, such as weight training, Pilates, or yoga. They are learning experiments. Because the focus is on learning, Feldenkrais exercises are often referred to as lessons.
These lessons value awareness and curiosity over effort and repetition. Moshé Feldenkrais, the founder of the method, described the goal:
“The lessons are designed to improve ability, that is, to expand the boundaries of the possible: to turn the impossible into the possible, the difficult into the easy, and the easy into the pleasant.”
— Moshé Feldenkrais, Awareness Through Movement
During the lesson, you move with heightened curiosity and awareness. This lets you identify which of your movements are strained and find more efficient movement alternatives.
Feldenkrais balance exercises: why strength isn’t enough
Staying upright is work. How much depends on where your weight sits over your feet. In nearly every first lesson, I demonstrate this with a 10-pound medicine ball representing the head and a cardboard roller representing the skeleton. Centered over the roller, the ball stays there without my holding it. As it moves off-center, my hands must work to keep it from falling.
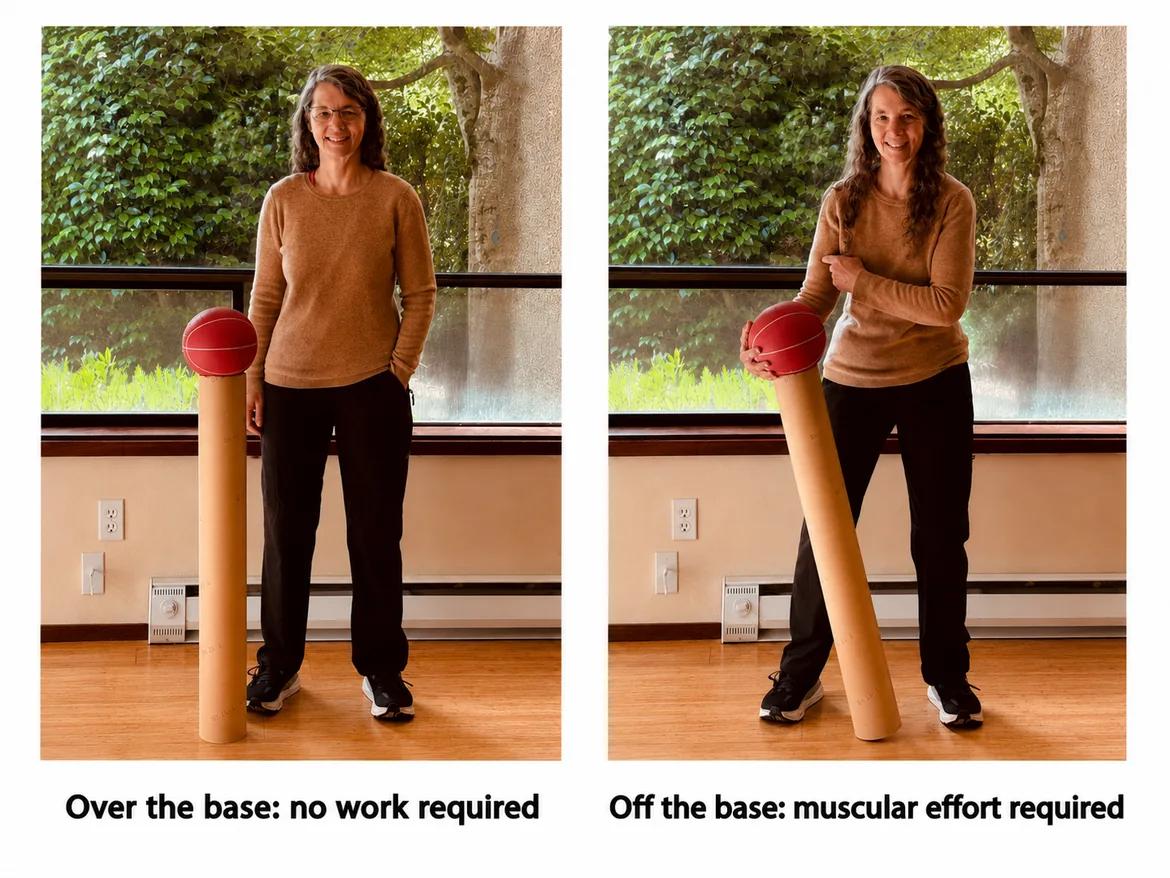
The body is more complex, but the principle is similar. The farther your weight moves from your base of support, the more work it takes to stay upright. Strength matters, but it isn’t enough. I have worked with strong people who are unsteady on their feet. When they find a way to stand with their weight over their feet, standing becomes easier and feels more secure.
For this exploration and the ones further down, go slowly. You can only notice a difference if you are moving slowly enough to feel one, and striving for a result works against that. Do only what feels easy and interesting, and only for as long as it feels that way. Stop if you feel strain or discomfort.
Stand near a counter or wall you can touch.
- Place your left foot a short step in front of your right, with most of your weight on the right leg.
- Slowly shift forward until most of your weight rests on the left leg. Pause and notice what changes.
- Return to the starting position and repeat several times.
As you shift forward, notice whether you collapse into the front hip and knee or lengthen upward through the front leg. Explore both gently. Which leaves you more ready for the next step?
Moshé Feldenkrais described good posture as the ability to move in any direction without hesitation or preparation. If you sink onto the front leg, you may need to rise again before taking the next step.
Now walk a few steps. As your weight arrives on each foot, notice whether you sink or are immediately ready for the next step.
A Feldenkrais exercise: exploring how you lift your arm
Lie on your side with both your arms straight in front of you. Now lift your top arm toward the ceiling and then behind you. In a gym or yoga studio, this movement might be done as a stretch that aims to twist your spine and open your chest as much as possible.
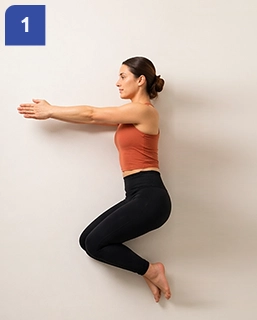
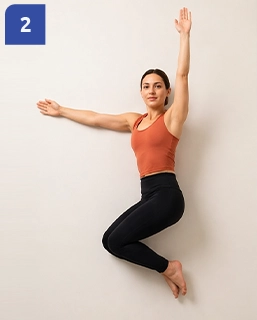
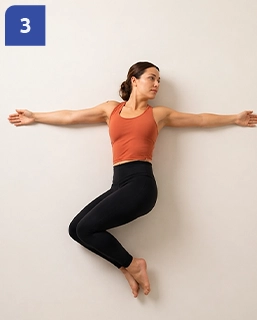
As a Feldenkrais practitioner, I’m not interested in how far your arm moves or what end position you can reach. Instead, my goal is to use this movement to help you learn to lift your arm easily and lightly. It should take the same perceived effort as lifting your pinky finger.
We improve it by exploring how you currently do it and considering what other options exist. For example, we might look at what happens at the very beginning, when the top hand first lifts and loses contact with the lower hand. We might explore questions like:
- Did you glue your shoulder blade to your ribcage or did your shoulder blade counterbalance the weight of the arm?
- Did you hold your chest still or did you allow your sternum to turn toward the ceiling?
- Was your breathing regular or did you hold your breath?
- Did your lower leg engage with the floor or was it uninvolved in the movement?
Now, having explored your habitual way of lifting your arm, I want you to try a different option. Begin by rolling a little forward and back, keeping your elbows straight, so that your top palm slides forward and back over your lower palm. Do that a few times.
Then, when that becomes easy, lift your arm as you roll back. Let counterbalance help, i.e., let the weight of your torso rolling back and down help lift your arm. What do you notice about this option?
Feldenkrais shoulder exercises: further explorations of the arm lift
This variation goes further into how your shoulder blade, ribs, and torso can help your arm move more easily.
In each of the movements below, go slowly enough that it stays easy. If it starts to feel like effort, make it smaller. Return to lying on your side, both arms straight out in front of you, and lift your top arm toward the ceiling.
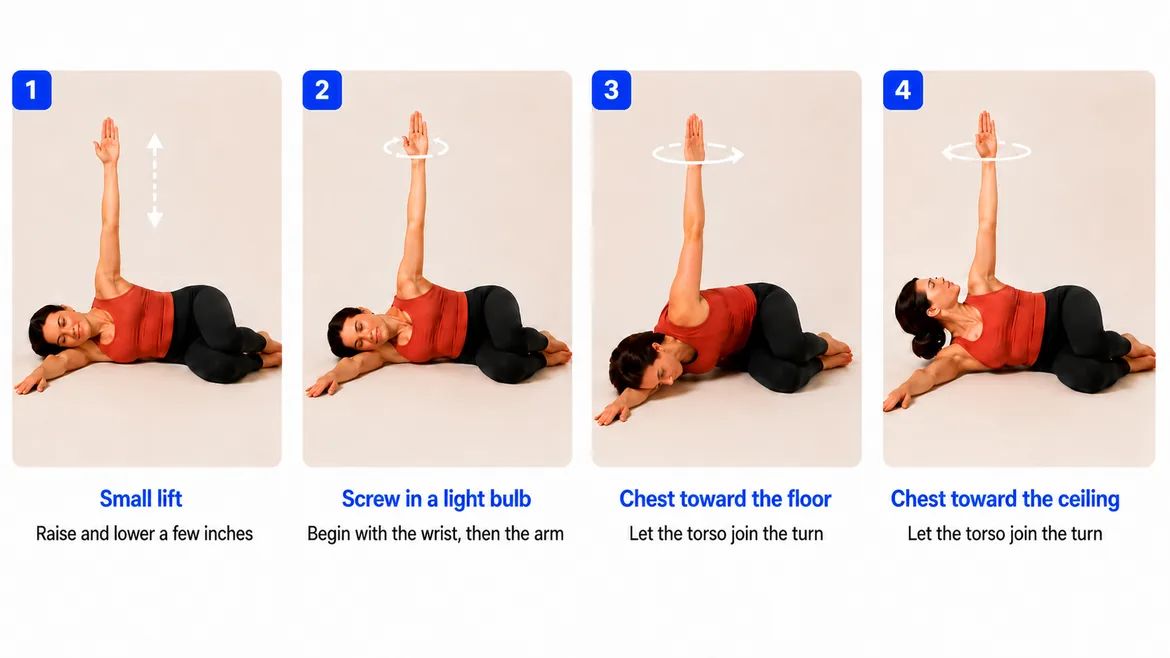
- Keeping your elbow straight and your hand pointing toward the ceiling, reach your whole arm upward a few inches, then let it return. Does your shoulder blade slide across your back?
- With your arm still pointing toward the ceiling, begin turning at your wrist as if screwing in a lightbulb. Let your forearm join, then your upper arm and shoulder.
- Let your torso join, turning so your chest rolls toward the floor. How far is the movement going through your ribs and back?
- Now turn the other way, so your chest opens toward the ceiling. Notice what your head and back do this time.
Now repeat the original arm lift exercise, bringing your arm to the ceiling and behind you. Does it feel easier or simply different? Notice whether allowing more of your body to participate changes how your arm moves.
Why I’d suggest starting one-on-one
You developed your basic movement skills in childhood. You can keep improving them, and find more graceful ways of moving. Jeanine and Kate each did that in one-on-one lessons at my studio. Jeanine described her experience:
“I learned to allow my skeleton (my bones) to support my weight and movement, instead of my exhausted tense muscles – as it was designed to do. I was able to attain significant changes in my sitting and walking posture affording me noticeable relief of the back pain.”
— Jeanine, RN
Kate explains how she learned to walk without pain:
“I learned how to employ the larger muscles in my torso so that the smaller muscles in my legs and ankles are not strained. When my hips, spine, sternum, and shoulders are all involved in walking, the pain goes away.”
— Kate
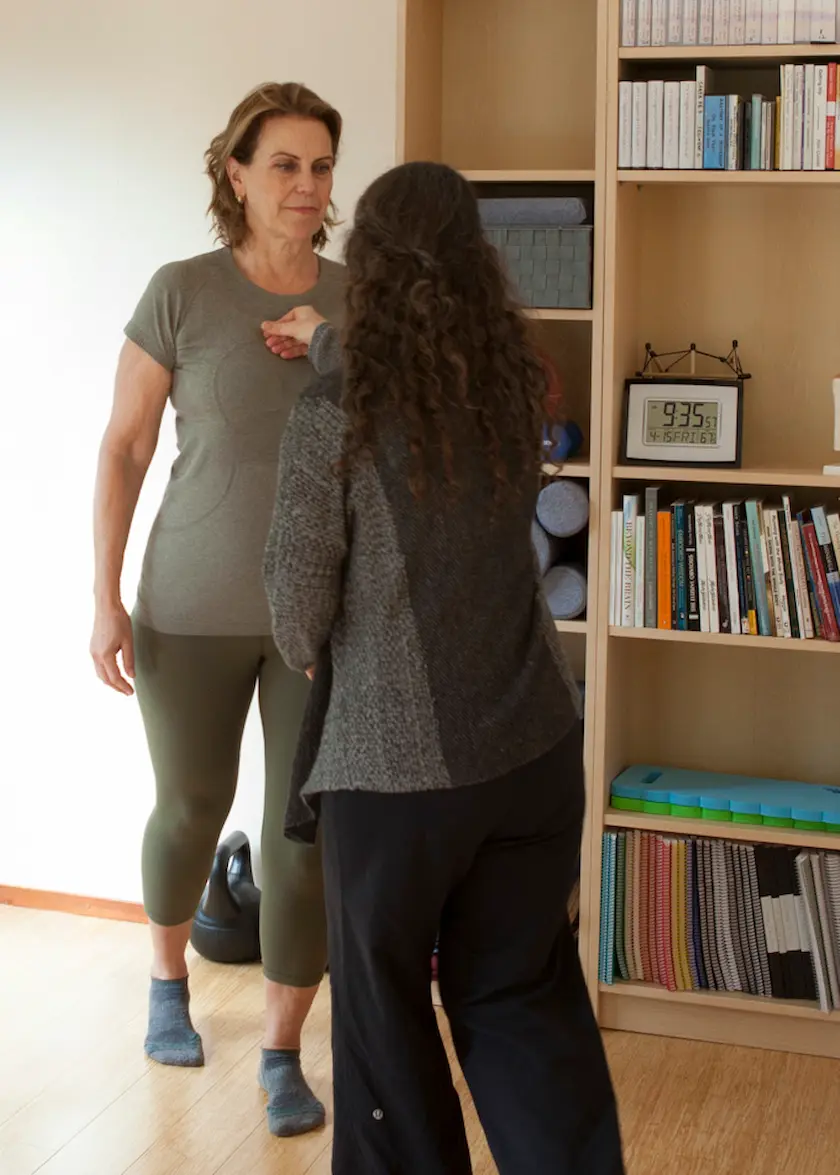
If you tried the explorations above, some of the questions were probably hard to answer. Most of what you do while you move is invisible to you, because it is habitual. That is the part I watch for and bring to your attention. You can keep going on your own with recorded lessons, and plenty of people do. I’d still suggest working one-on-one when you’re starting out.
Book a free consultation55 minutes, in person in Kirkland. I’ll tell you whether I can help. No obligation.
Questions people ask before their first lesson
Do I need any special equipment?
No. Most lessons can be done on a mat, a chair, or standing. A firm surface and enough room to lie down is all you need. If lying on the floor is hard for you, a bed or a padded surface works, and so does doing the whole lesson sitting.
How often should I practice?
A few minutes a day is more useful than an hour once a week. These are learning experiments, and learning happens through repeated small exposures rather than through a long session.
Will a lesson hurt, or be too difficult for me?
It shouldn’t. My work is as far away from the “no pain, no gain” philosophy as one can be. The process of learning to move with ease and comfort requires us to always be in ease and comfort. We start with movements you can do easily and build from there, and we never push past what’s comfortable. The table is low, and if lying down is hard for you, we can work sitting or standing.
Is this like massage?
No. In massage, the practitioner works on your soft tissue to relax the muscles. In a Feldenkrais lesson, I use touch to help you learn how you move. We’re wired to pay close attention to where and how we’re being touched, so my hands bring your awareness to what you’re doing. I’ll also move you in ways that let you feel where you’re holding, and sense movement patterns you didn’t know were there. You stay fully clothed the whole time.
It’s hard to describe in words, which is the main reason the free consultation is in person.
Should I see a doctor first?
If there’s any sign the problem is medical rather than a movement pattern, then you should see a doctor. Feldenkrais doesn’t replace a diagnosis or medical treatment. Once a doctor has checked it, we can look at how you move, and see whether improving it will help you.
Book a free consultation
Fifty-five minutes, in person at my Kirkland studio. We’ll talk about what you’d like to be able to do better and what you’ve tried so far. I’ll explain my approach. Then I’ll watch how you move. We’ll do some work together, so you get a taste of what a lesson is like.
At the end I’ll tell you whether I think I can help. Sometimes the answer is no, and I’ll say so.
Free, and there’s no obligation to book anything afterward.
If the calendar doesn’t load, use the booking page or email me at info@kineticinquiry.com.